Our article, Benefits of Root Cause Analysis in Manufacturing, introduced readers to the benefits of root cause analysis (RCA) and discussed its use in manufacturing. However, we stopped short of explaining the process itself.
This article continues our exploration of the topic and focuses on how to perform root cause analysis through an examination of two problem-solving methodologies.
First, we look at the American Society for Quality (ASQ) six-step process and then cover the A3 Problem Solving Method as it relates to RCA.
The Root Cause Analysis Process
The methodology of Root Cause Analysis
You’ll recall from our last article on the benefits of root cause analysis in manufacturing there is no standard definition of RCA. Thus, over the years, many methods for understanding the core issue beneath a problem have become part of the root cause analysis toolkit.
So it is easy to drown in the literature to find what is best for you. To make the process easier, we’ll cover two of the methods that we see Evocon clients implement successfully to reduce machine downtime and improve OEE while using our downtime tracking software.
As mentioned in the introduction of the article, the first is the six-step method, as defined by the American Society for Quality (ASQ). It is holistic and widely used in the manufacturing sector due to the industry’s trust of familiarity with ASQ standards. The second, and a very similar process, is the A3 problem-solving method.
We’ll see that while they have different descriptions of steps, they still share the same intent. Further, when looked at holistically, they both accomplish the same series of steps.
Before you move forward with any of the two methods, let’s take a quick look at who should be involved when you perform root cause analysis on any of the issues that you’ve identified in your production process.
Forming RCA teams – Who needs to be involved?
Anyone can contribute to the root cause analysis process and benefit from its tools and principles. So, the answer is simple: everyone. When it comes to the formation of a project team though, there are some general guidelines to keep in mind.

Most teams using root cause analysis to solve problems are small, only having 2-5 members. That said, depending on the problem and situational complexity, team size can vary. On rare occasions, they can even grow very large, spanning multiple departments with 30-60 members.
These teams are by nature and need, cross-functional. Typically, they will contain some variation of the following.
- Subject matter experts (SME). SMEs provide specialized knowledge of the problem type. Or, they have experience working directly in the process being studied. For example, if we found that the format of the start of shift meetings that are run by the Operations Manager was not effective and we formed an RCA team to get to the bottom of why, the Operations Manager would be a good candidate to consider as SME.
- Manufacturing Engineering (ME). ME’S have a broad knowledge of the plant and deep expertise on its processes and equipment.
- Quality Engineer or Process Improvement Specialist. Provide specialized expertise in quality and process improvement.
- Manager or Supervisor of Process. This is crucial so that the team contains the authority to implement the proposed solution.
Now that we know who should be involved in the process, we can look at which method to use and how.
ASQ Six Steps Method
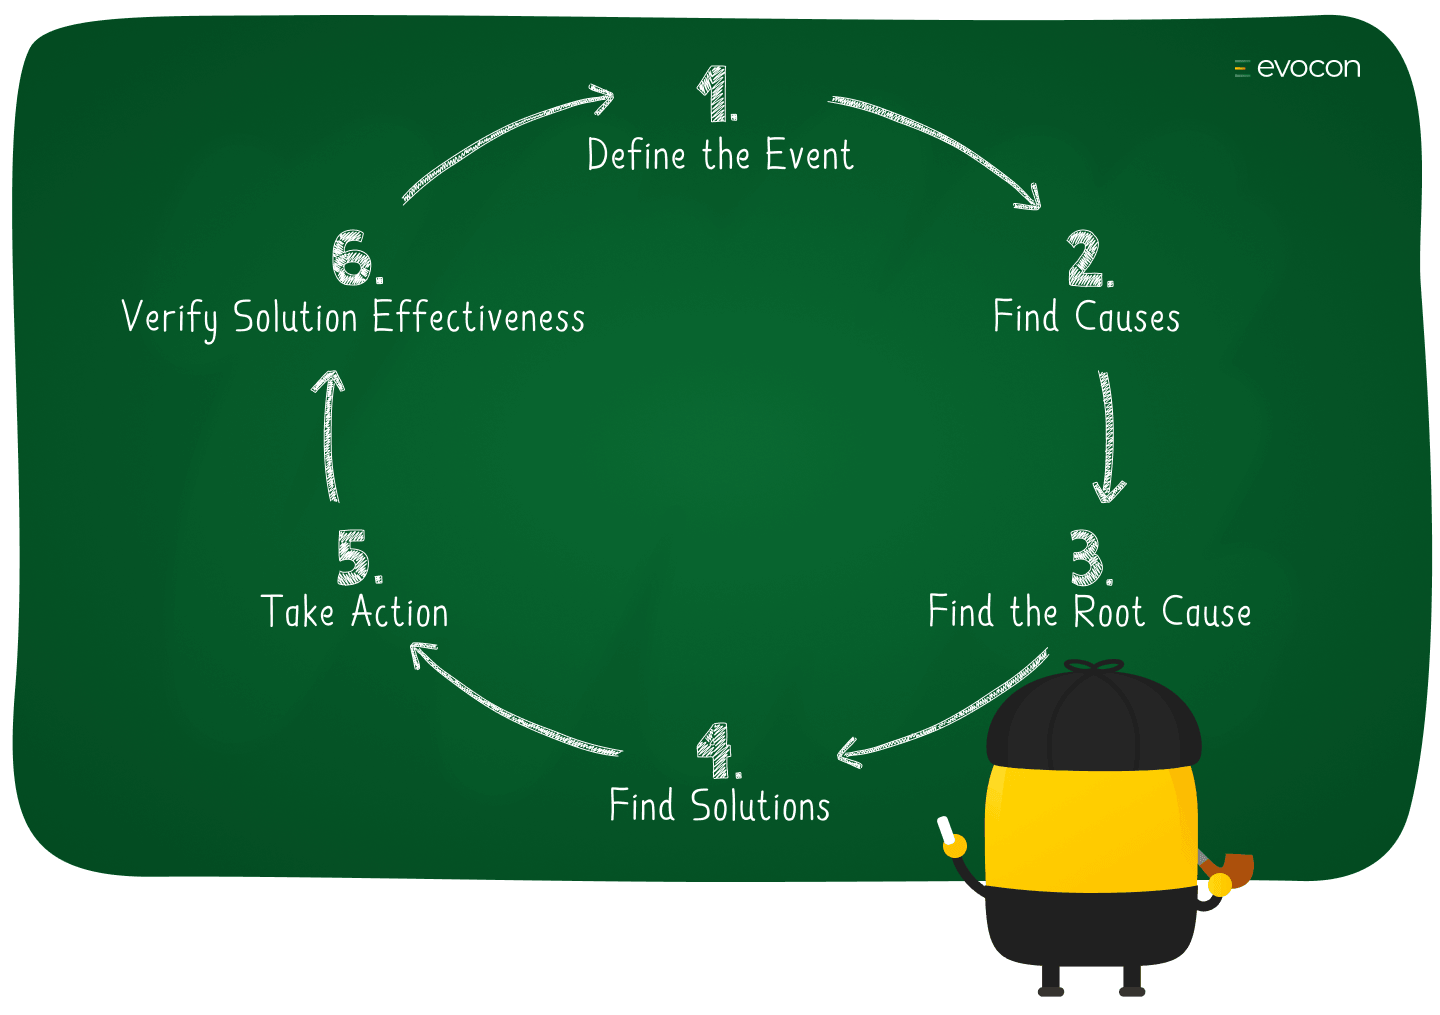
Let’s start by looking at the six steps to perform root cause analysis, according to ASQ.
- Define the event
- Find causes
- Finding the root cause
- Find solutions
- Take action
- Verify solution effectiveness
Step 1. Define the event
Step 1 transforms the “big hairy problem” known at project initiation, into an accurate and impartial description of the event. It includes everything from forming the team, which we discussed in the previous section, to making a plan for the project. Though the most critical purpose of the step is to clarify what the problem is and define its scope.
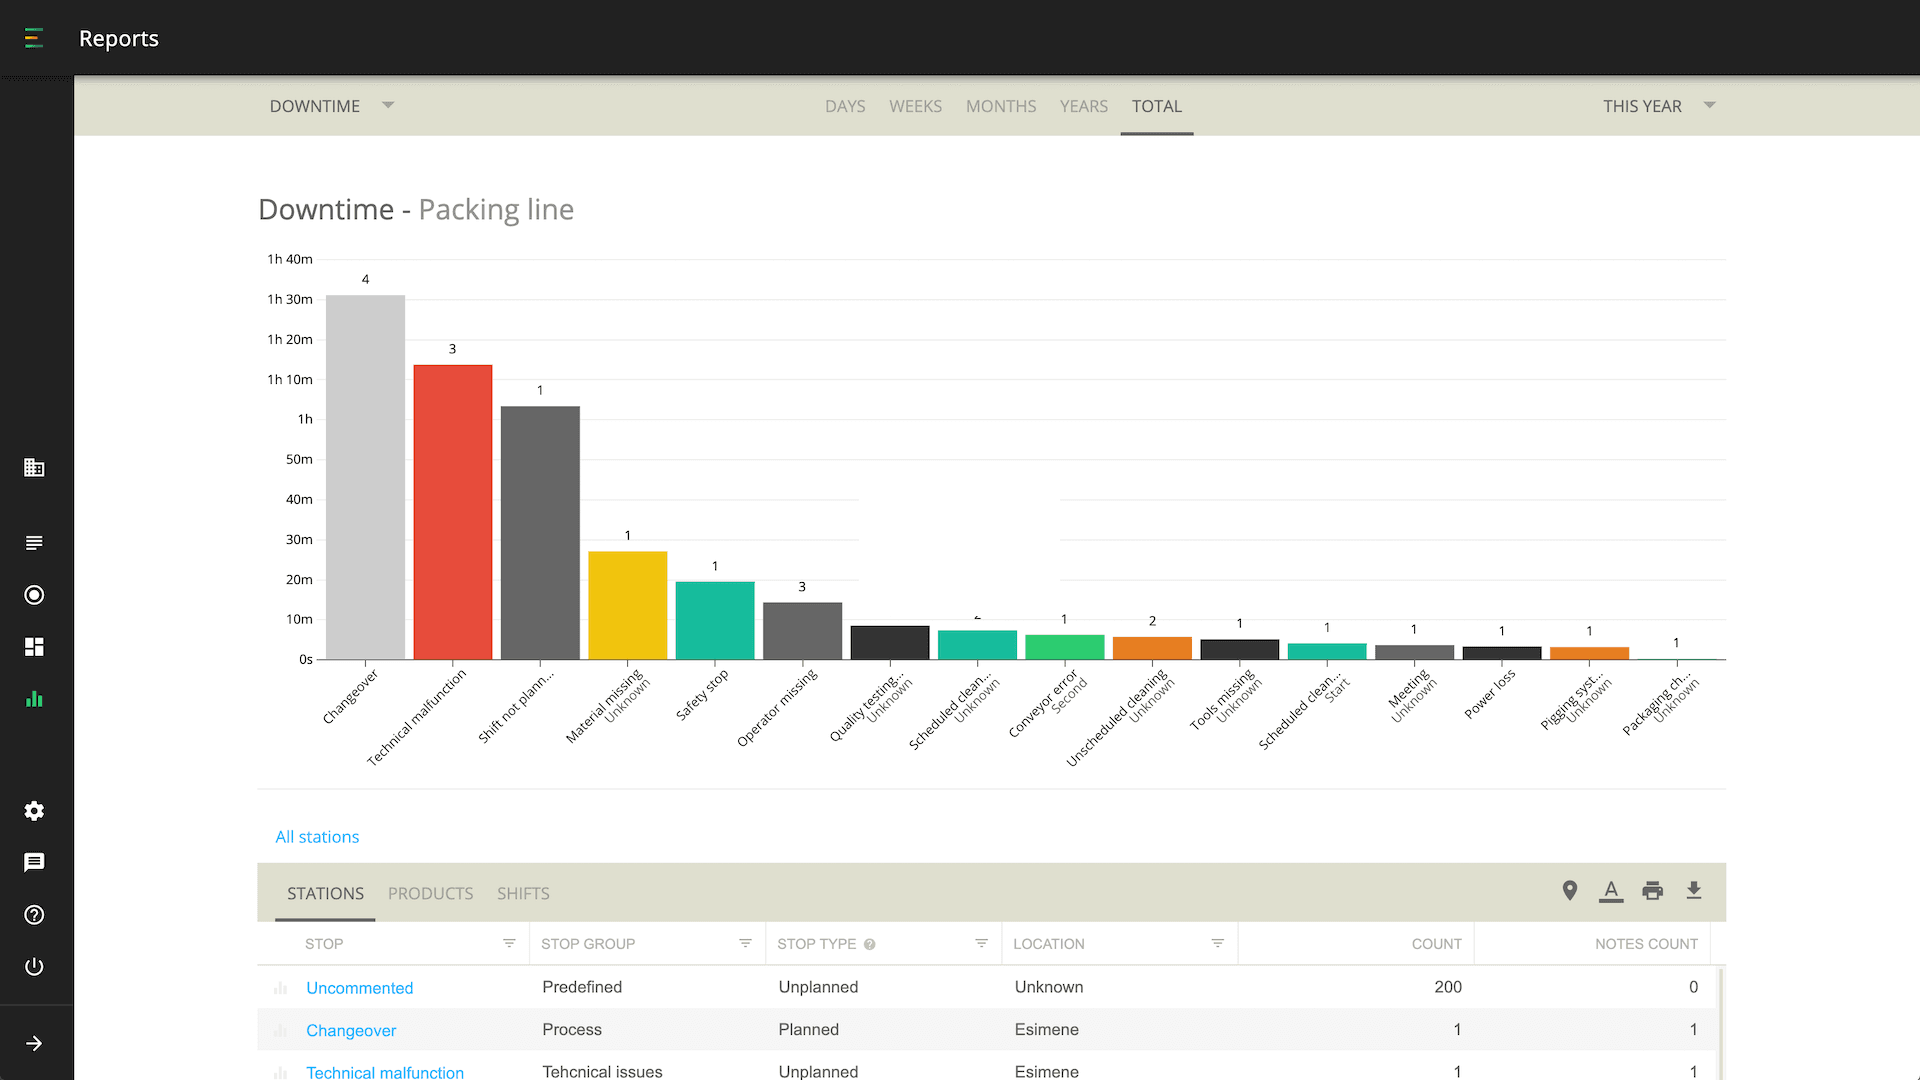
If you are using Evocon’s OEE software to monitor your production, then you should start the process by opening your machine downtime report and analyze which breakdown causes contribute most to losses in production performance.
It is critical to the success of the process that the team shares a common understanding of the problem. So, take your time at this step to make sure the groundwork is complete and correct. At a minimum, the team must gather specific details that provide answers to the following clarifying questions.
Clarifying Questions
- What happened?
- Where did it happen?
- Is it new?
- Did something change?
- What impact or consequences are there?
- Who was involved?
Remember, there is no room for bias or emotion in your answers. Further, try to refrain from including symptoms or suspected causes.
TIP: Go to the source of the problem
This is a good point to bring an essential principle of root cause analysis to your attention. To be effective, it must be more than mere theoretical exercises (though these do have merit and use).
It is important that those investigating the problem get out of the office and out to the shop floor. This was where the problem starts and where most information about it will be found.
Production Tracking Software
Start monitoring your production and get a real picture of what’s happening on the shop floor.
Step 2. Find causes
Step two, as you may guess from its name, focuses on finding potential causes of the event in question. Your goal should be to uncover as many causal reasons as possible. This pushes you to dig into the issues which will help you develop a deeper understanding of the problem.
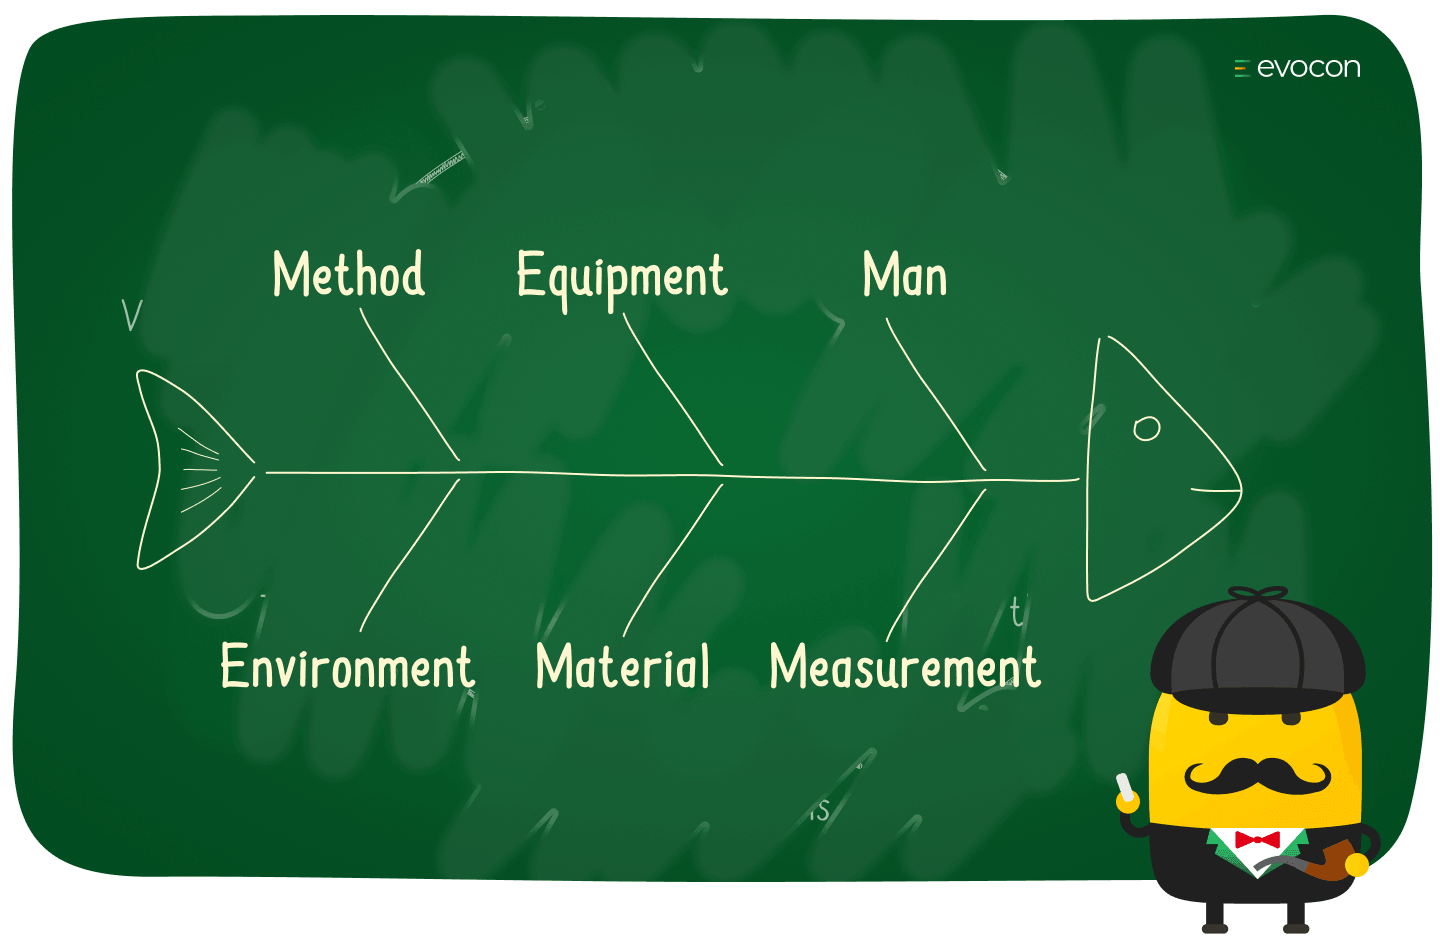
In this step, all voices should be welcomed and encouraged through exercises such as brainstorming, process mapping, and Fishbone Diagrams. Creativity and free-thinking will serve the team well and deserve encouragement almost to the point of a mandate. All kidding aside, the goal is to cast a net wide enough around the problem scope so that identification and consideration of all possible causes are achievable.
Step 3. Finding the root cause
In step three, we have arrived at the reason why we began: to uncover the root cause that lies at the heart of the problem. Several tools can help us reach our goal. Below is a list of the most common tools that manufacturers use.
While covering each of the tools is outside our scope, you can learn more in our article on Five Whys.
Common tools
- Five Whys
- Histogram
- Fault Tree
- Scatter Chart
- Cause & Event Tree
- Pareto Analysis

Step 4. Find solutions
Now it is time to turn our minds to the process of attempting to design a possible solution or solutions. Brainstorming is a very effective method for identifying potential solutions in a team environment.
As you work through this step, we encourage you to involve as many people as possible. Anyone with a possible solution or who will face change from the implementation of a solution should be welcome.
Common tools
- Interviewing
- Brainstorming
- Benchmarking
- Flow Chart
- Why Not Process
Step 5. Take action

The intent of step five is to implement the proposed solution that the team has created. Further, the team must take steps to ensure the sustainability of the change. Using an Impact Effort Matrix or Force Field Analysis may be helpful tools for this step.
The main ingredient for success at this step is tenacity and patience to see the project through to completion. There can be a tendency of project team members to bring the project to a conclusion. This is because the team will be approximately 4-8 weeks into the process at minimum at this point. Therefore, the team must be willing to avoid prematurely concluding that the problem was solved.
Finally, we need to ensure the changes and improvement stick. To this end, we recommend involving anyone who will be affected by a change now.
Step 6. Assess solution effectiveness
In this step, we measure and assess the effectiveness of our implemented solution. This requires us to turn a critical and analytical eye on the solution to confirm that it has worked.
If it has, then congratulations, the project’s conclusion has arrived. And it is time to look at the next issue that needs your attention.
A3 Problem Solving Method
A3 Problem Solving has its origins in the Toyota production system (TPS). It takes its name from the 11×17 A3 paper that TPS often employs. A3 ensures everything about a potential problem, proposal, etc. can be succinctly found on one sheet of paper.
We have included the A3 method for three reasons. First, it is often the method that will be taught in connection with lean manufacturing principles. Second, many Evocon clients have had success using it. And third, by contrasting it with ASQ, we reinforce our point that root cause analysis has no standard definition.
Yet as we will see, while the steps differ slightly, the two methods ultimately work through the same sequential process when looked as a whole.
Similarly to the ASQ method, problem-solving using A3 also follows a six-step process.
If you would like to get a more in-depth overview of the A3 Problem Solving method, then we recommend reading “OEE at Work” by Mark Wetherill and Aivar Künnapuu.
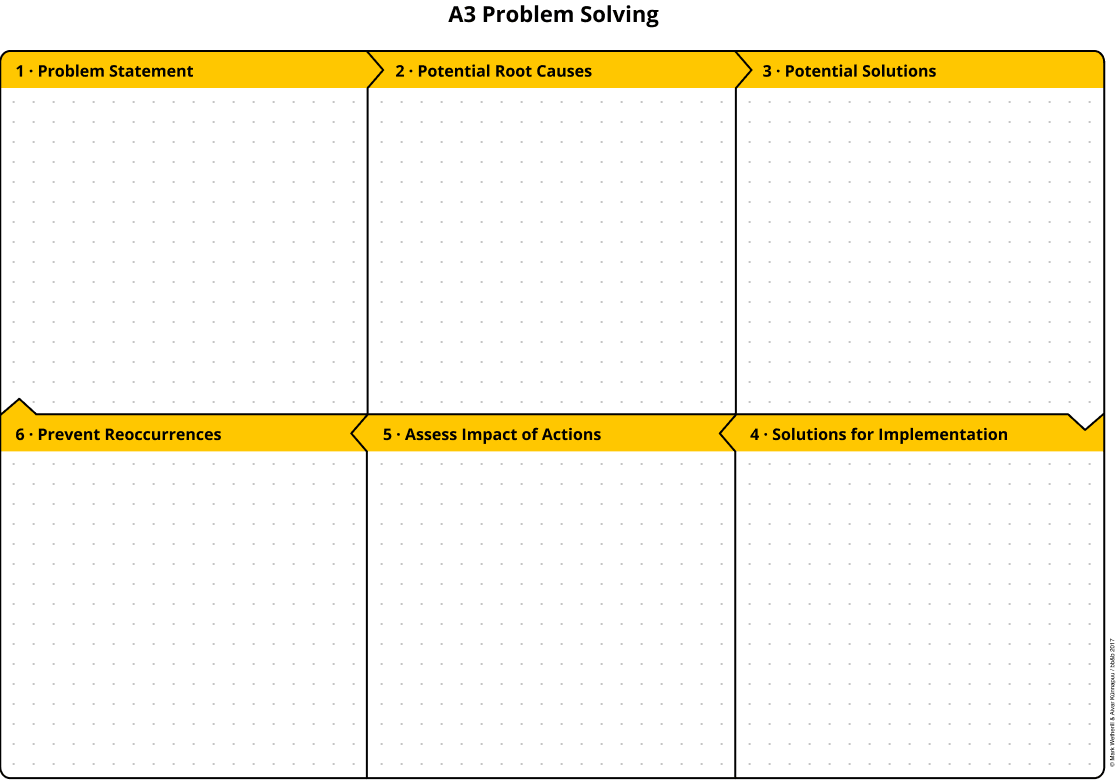
Download the A3 template as a PDF file
Step 1: Stating the problem
The first step in A3 is stating the problem. While it uses different words than the first ASQ step, they are effectively the same. In fact, everything said regarding step 1 for ASQ above applies here.
To avoid going through the same thing again, please refer back to that section if you need to refresh it.
Step 2: Identifying potential root causes
Here again, A3 is essentially the same as ASQ in that both are concerned with identifying causes. The key difference here is that A3 does not separate the search for all potential causes for the search for the root cause. Other than this point, everything that has said in step 2 for ASQ applies here as well.
Download our Fishbone diagram template and 5 Whys template
Step 3: Find potential solutions
This step is the same as ASQ step 3 and everything that is said there also applies here as well. We encourage the reader to refer back as necessary.
Step 4. Evaluating potential solutions
In this step, you will need to assess the options that you have brainstormed to select which one works best. To do this, you can use a simple evaluation matrix that organizes each solution to be assessed based on:
- How effective will it be in eliminating the specific root cause? – Effect
- How easy is the solution to implement? – Effort
To keep with comparison to ASQ, we find that the evaluation of solutions takes place in step 4 as part of the “find solutions” process.
Download the Effort & Effect Matrix template
Step 5. Implementation and follow up
Based on the evaluation and prioritization of solutions, you now need to create an action plan for implementation.
The process of creating an action plan is quite straightforward:
- Create a list of actions based on the effort and effect of implementation.
- Reference each action to the category of the Fishbone diagram. You can skip this step if you only use 5 Whys for the root cause analysis.
- Assign a person responsible for each action.
- Define a time when the action must be completed.
After this is done, it is time to follow through and continuously review the progress. Your checklist for follow up should consist of the following questions:
- Did the implemented solution solve the problem?
- Are any adjustments needed for actions?
- What is the date and time to review the actions?
Again, to continue the point on ASQ, this step is the same purpose as “Take Action” found in ASQ’s fifth step.
Download the Waste Elimination plan template
Step 6. Prevent recurrences
This final step of the A3 problem-solving is all about preventing the recurrence of the problem that you have worked to eliminate. Assuming the actions you took eliminated the loss, you should:
- Standardize new methods and solutions.
- Apply elsewhere if possible.
- Share best practices to similar sites with similar processes where the result of the root cause analysis process can be applied.
Similar to other steps compared above, ASQ does not have a dedicated step for preventing occurrences. Rather it is a substep of Step 5 “Take action”.
Download all A3 process templates in one PDF file
Summary
In this article, we have introduced the process to perform root cause analysis in much detail. This was accomplished by walking through six steps of two methodologies: ASQ Six Steps and A3 problem-solving. This step-by-step look at the process and tools of both will have given you the base level knowledge necessary so that you can begin utilizing root cause analysis in your plant today.
However, it must be said that there are indeed whole books dedicated to the subject of root cause analysis, many of which contributed to the basics presented in this article. If you are interested in further study, the following titles are a great place to start.
Learn more
Root Cause Analysis: The Core of Problem Solving and Corrective Action, Duke Okes
Understanding A3 Thinking: A Critical Component of Toyotas PDCA Management System
OEE at Work – A Practice Guide to Managing Overall Equipment Effectiveness
